Have you ever dreamt of becoming the next big fashion designer in the Roblox metaverse? Well, you’re in luck! Creating custom Roblox shirts is easier than you think, even if you’ve never designed anything before.
In this ultimate guide, we’ll walk you through every step of making a Roblox shirt, from brainstorming cool Roblox shirt ideas to showcasing your masterpiece on your avatar. “Your creativity knows no bounds – it’s time to show Roblox what you’ve got!”
Essential Tools & Free Resources
Before we dive into the exciting world of Roblox shirt design, let’s gather our tools. The best part? They’re all completely free!
- Roblox Studio: This is the official, FREE software where the magic happens. Don’t wait any longer! Download Roblox Studio from the official website and take the first step towards creating your own awesome Roblox clothing line.
- Free Image Editors: If you’re feeling fancy, try free online editors like Canva or Pixlr for extra design power. Canva is perfect for beginners with its easy templates, while Pixlr offers more advanced features for experienced creators. And don’t forget, Roblox Studio has basic drawing tools built right in!
- Free Roblox Shirt Templates: These handy templates are your blank canvas. Roblox provides official templates, and you can find tons more online made by the awesome Roblox community. Templates make designing a breeze, especially for first-timers.
Designing Your Roblox Shirt Step-by-Step
Time to let your imagination run wild and bring those Roblox shirt ideas to life!
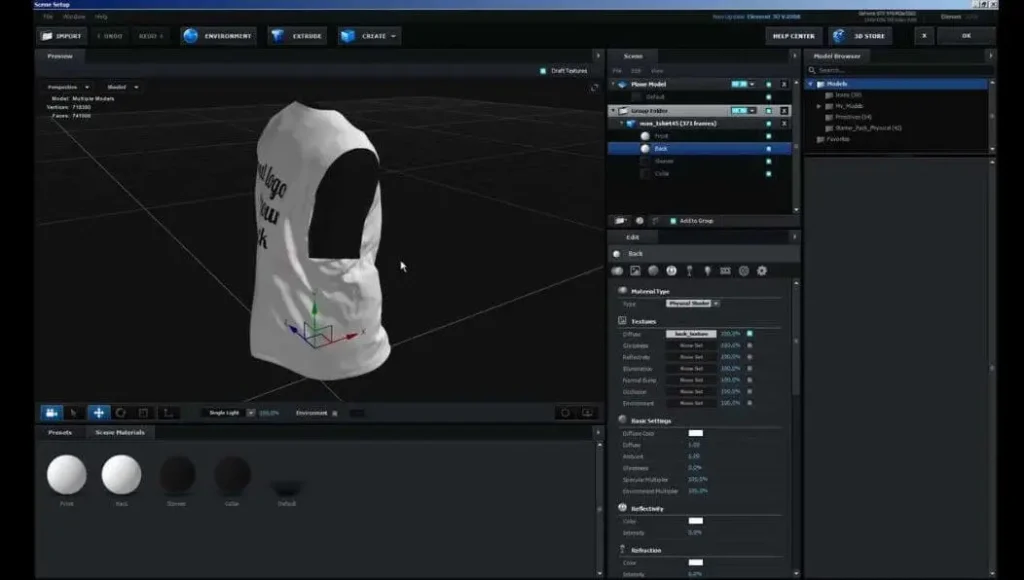
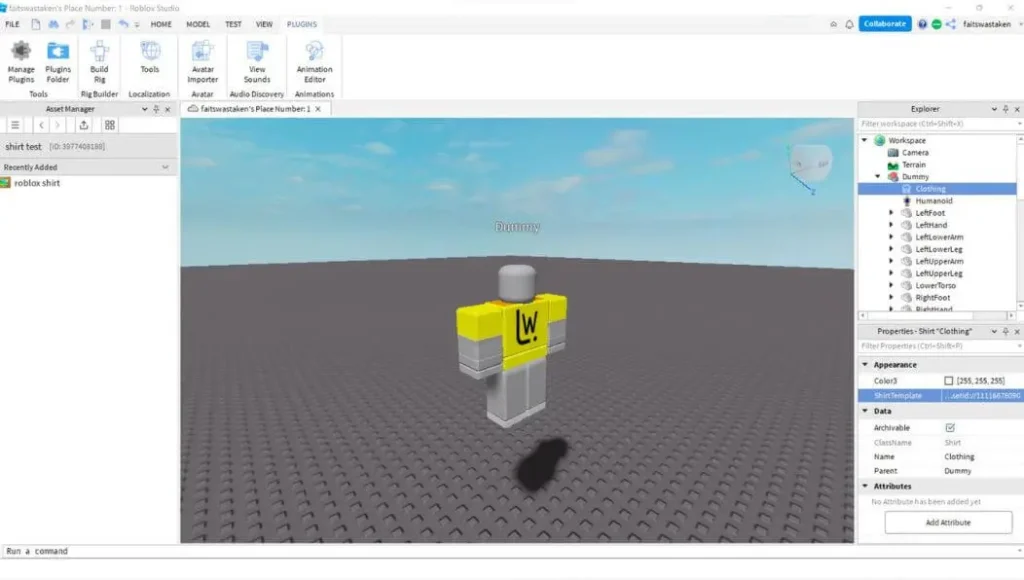
- Opening a New Project: Fire up Roblox Studio and click on “New.” Pick the ‘Shirt’ template, and it’s like stepping into your very own design studio. This blank canvas is calling out for your unique touch.
- Understanding the Template: Think of the template as a map of your shirt. Each section matching to a part of your Roblox avatar’s body. The front, back, and sides will wrap around your avatar perfectly when worn.
- Easy Design Techniques for Beginners:
- Start Simple: Use the “Fill” tool to color in different sections. Experiment with various shades and hues to create a color scheme that’s uniquely yours.
- Add Details: The “Brush” tool lets you add patterns, textures, or even freehand drawings.

- Make a Statement: The “Text” tool lets you add cool slogans, your name, or funny quotes. Remember, you can always undo with Ctrl+Z (or Cmd+Z on Mac) if you make a mistake.
- Leveling Up Your Design :
- Layers: Ready for more complexity? Add layers to your design to overlap elements like images and text for a professional look.
- Import Your Artwork: If you’ve created artwork elsewhere (in PNG or JPG format), you can easily import it into Roblox Studio.
- Decals: These are pre-made images you can add to your shirt. Roblox has a vast library of free decals, and you can find tons more online.
For more info.
Sharing Your Masterpiece: Uploading Your Shirt to Roblox
You’ve created an awesome design – now it’s time to share it with the world!
- Save as a PNG: Ensure your masterpiece is saved as a PNG image. Aim for dimensions of 585 pixels wide by 559 pixels tall for the best quality.
- The Roblox Website: After logging into your Roblox account, you’ll find the “Create” tab at the top of the page. That’s where we’re headed next!
- pen_spark
- Select “Shirts” from the menu.
- Naming & Pricing: Choose a catchy name that will grab attention on the Roblox marketplace. If you want to sell your shirt, set a price in Robux. Don’t worry, we’ll discuss pricing tips later!
- Roblox Moderation: Your shirt will undergo a quick review process to ensure it follows the community guidelines. You’ll receive an email once it’s approved.
Put Your Shirt on Display!
Now that your shirt is ready, let’s get it seen by the Roblox community!
- Wear It Proudly: The simplest way to showcase your creation is to wear it on your Roblox avatar. Head to the Avatar Editor and equip your new shirt. Exhibit your skills and let everyone be impressed by your design!
- Share on Social Media: Spread the word far and wide! Post screenshots of your avatar rocking the shirt on platforms like Twitter, Instagram, TikTok, or in Roblox groups. Don’t forget to use relevant hashtags like #Roblox, #RobloxClothing, and #RobloxDesign.
- Create a Roblox Group (Optional): If you’re serious about designing and want to build a community around your creations, consider starting a Roblox group. This is a fantastic way to connect with other fashion-forward players, share your designs, and even offer exclusive group-only items.
- Roblox Marketplace (Optional): Ready to turn your passion into profit? You can list your shirt on the Roblox marketplace and earn Robux when other players purchase it. Keep in mind that the marketplace can be competitive, so pricing and marketing your shirt effectively are key.
Troubleshooting & Common Questions
Ran into a hiccup? No worries! Here are solutions to common issues:
- Blurry Images: If your shirt appears blurry on your avatar, it might be due to low image resolution. Make sure your design is at least 585×559 pixels and try increasing the size in your image editor before uploading.
- Moderation Rejection: If your shirt gets rejected, don’t be discouraged. It’s usually due to minor issues like using copyrighted material, inappropriate content, or text too small to read. Review Roblox’s guidelines and make the inevitable adjustments.

- Pricing Concerns: Not sure how much to charge for your shirt? Consider the design complexity, time invested, and what similar shirts are selling for. Start with a reasonable price and adjust it based on demand and feedback.
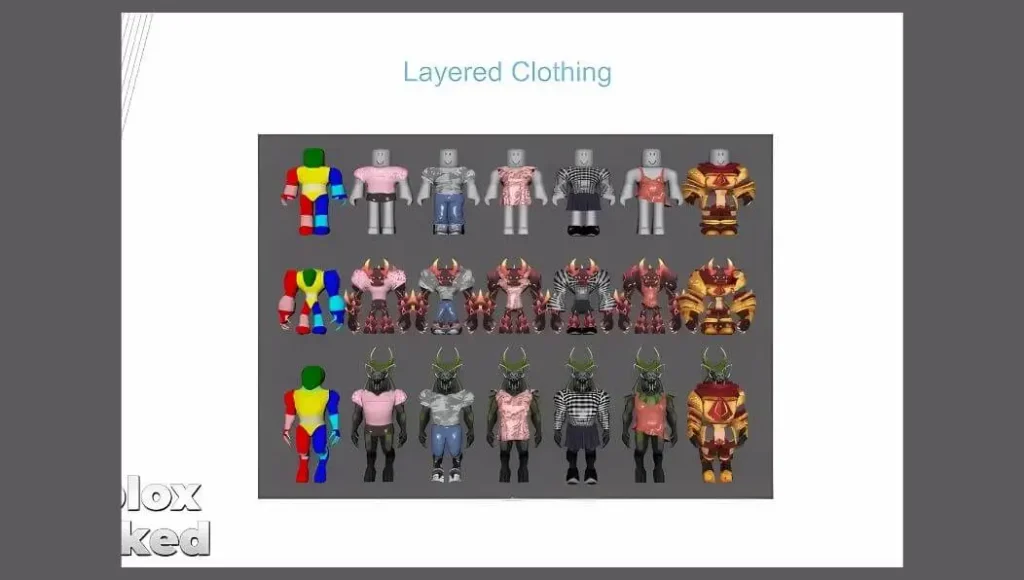
- Expanding Your Repertoire: Feeling inspired? You can use the same process to design other clothing items like pants, t-shirts, hats, and even accessories for your Roblox avatar!
Conclusion
Give yourself a pat on the back you’ve just unlocked a whole new world of creative possibilities on Roblox! You’ve learned how to design in Roblox Studio, navigate the uploading process, and promote your creations. Now it’s your turn to shine!
Unleash your inner fashion designer and create unique clothing items that reflect your style. Don’t be afraid to mix things up! Play around with different techniques, experiment with a whole rainbow of colors, and go wild with patterns. Then, share your awesome creations with the world – you might just inspire the next big Roblox fashion designer
Remember, the Roblox community is always eager for fresh and exciting designs. So, what are you waiting for? Become the trend-setter you were meant to be by starting to design your own Roblox shirts now!